Wireshark is a powerful network traffic analysis tool that is useful in digital forensics. By setting up Wireshark on a portable disk, real-time forensics can be performed to assist with incident response and triage. This forensic tool allows investigators to grasp the situation quickly and stop the attack while gathering evidence and data to stop future attacks.
Setting up Wireshark for mobile use
One of the ways Wireshark can be installed is as a portable app[1]. This allows it to be used through a thumb drive or other portable disk. The notable advantage is the ability to plug into any computer and analyze network traffic. To start, choose a drive and make sure it is formatted. While you can download the portable version of Wireshark to any device, it is good practice to have a dedicated drive for your digital forensics tools. Once downloaded, run the installer and make sure your target drive is the portable drive you intend to use. The installation is similar to the standard version of Wireshark, just with fewer options. Once installed, that’s it. You can now take Wireshark on the go and run it on any computer you have access to.
Note: As Wireshark is a powerful information gathering tool, you should only use it on systems that you have written permission for. The author does not condone, encourage, or support the use of Wireshark for any activities that may be illegal or outside of the users permission scope.
Starting the Hunt
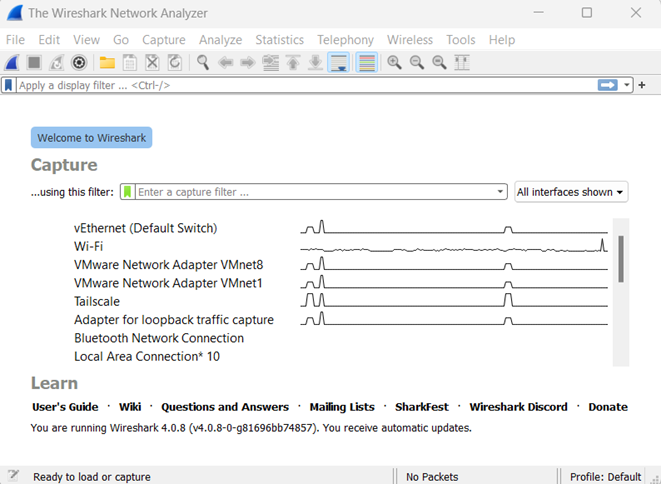
Once ready, plug the drive into a computer and run the Wireshark portable application. It will launch just like normal, and you should start to see network traffic populate the home screen. Then, choose a data stream and click the blue fin on the top left, or simply click capture to select multiple data streams, and start a capture[2].
Figure 1: The Wireshark startup page
You should see data start to populate the screen at this point showing all the current network traffic flowing in and out of the device. From here we’ll focus on gathering and analyzing data in real-time.
Filtering out the Noise
In a real-time scenario, it is important to quickly hone in on what data is important. The best way to do this is to filter out everything you already know you do not need[3]. The best way to do this is to create a formula to filter out data quickly. We will start first with IP addresses. If you know which addresses exist on the internal subnet, you can create a filter to remove all of them from the view. So we get: ip.src != x.x.x.x/x The last part is our CIDR address range, allowing us to filter all addresses in that subnet that are communicating with our device. As a note, this will also filter out the data leaving our device. Next, we will filter out unnecessary protocols. To do this, we will first use the && operator. This will allow us to add this filter to our current filter. Then simply use !(<protocol> or <protocol>). We can add as many protocols as we need to this line. For example: !(dns or arp or udp).
Figure 2: A basic Wireshark multi-filter
From here you can add any other filters you might want. There are many more powerful filters that can be used to narrow down on your target, such as the contains or matches filters. Once you do find a target in the filtered data that looks suspicious you can go another step deeper.
Follow the Stream
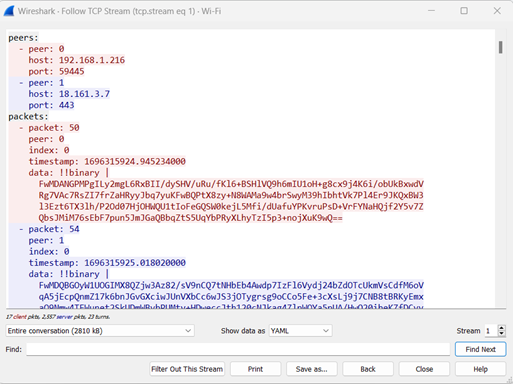
A great feature of Wireshark is the ability to follow specific protocol streams[4]. This allows the user to get a better view of exactly what type of connection was made and what data is being passed between the connections. After you have found a specific packet you want to follow, right-click, click follow, and then choose the stream type to follow. This will bring up the stream dialog box, showing information about the connection and data.
Figure 3: A TCP Stream in Wireshark
You may have to change the display type at the bottom from ASCII to another mode like YAML in order to get a clearer understanding of the data. The stream will now show the entire communication that occurred with all packages displayed. If it turns out that a stream was benign, you can choose to “filter out this stream”, narrowing your focus even more.
Conclusion
Wireshark is a very powerful tool when used correctly. Knowing the basics of creating filters and following streams can allow a user to effectively perform real-time forensics. Being able to perform real-time network forensics with Wireshark is key in being able to prepare for and perform an effective forensics investigation.